My original idea was to create a logo that represented a ‘Peace’, per say, between console and PC gamers because we are all in the same. I started my drawing off with a controller to represent console gamers then drew a mouse to represent PC gamers. I then decided to add a banner at the top with the words “One Love” for our shared love of games.
Original Sketch
When I began my rough design, I started with the controller since I knew it would take the longest to create! After well over an hour, and using this image as a base (image below), I finally finished the design. Many of the features such as the ‘figure 8’ looking parts holding buttons and the joysticks took me the longest to figure out how to make. After 20 minutes of messing with tools, I finally came up with an actual working ‘figure 8’. The buttons were easy to create because they are just circles or squares! Same with the joysticks. My final rough product turned out fantastic in my eyes!
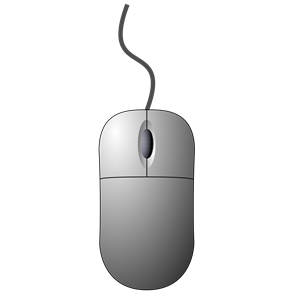
As for the mouse, it was very simple once I figured out how most of the tools work. I used this image as a base (image below).
And finally, My final product. I’m very excited about how this turned out because it was just as I imagined it. I know I can use a little work on the color aspect, but for a rough design, this one is a keeper.
Some things I will work on to help aid this into the final draft phase is adding color and lighting, as well as maybe shifting the sizes of a couple objects. Also, maybe make a background and add labels to the buttons!
My final graphic design was a roller coaster of ideas all running together into one image. I had many changes and rough draft-type ideas but finally came to the result in which I am very pleased with. I tinkered with many different tools in Photoshop and found some things that I felt were interesting enough to keep in my final design. After many conflicting ideas, here is the final result:
My original Idea was to create a poster to use as the background for my website. Since my topic is gaming, I had taken many screenshots as I was playing some games to use in my poster. I began cutting out parts of the images I knew I would probably end up using.
I cut out both the characters from Destiny 2 and the AK-47 from CSGO and began a layout of 1920 x 660 pixels for the project. I felt like since I had a female and a male character, I could contrast them by placing them on either side of the poster to make an asymmetrical first layout. I knew I’d want the AK-47 to be centered so that it fit with the asymmetrical theme and I wanted it big. I realized that if i was going to make a background for my website I should probably put some some words of welcome, so I added “Welcome” to the middle of my poster. Since I wanted to have the AK-47 centered as well, I was conflicted, until I found out about clipping. I could clip the AK to the word and it would show up inside of it! Perfect! I found this out while watching a YouTube video on cool things to do in Photoshop (15:45)! This is my first design:
I really liked how the AK clipped inside the word, but the poster was kind of bland and i wanted to stick to one topic. I ended up choosing Destiny 2 as the topic and kept with it. I went back into Destiny 2 and took some more screenshots. After some time, I threw together my design I used for my draft poster. This time I clipped the background image of the ship to “welcome” and really liked the results of how the word appeared to be blocky!
After reading the comments on my design I noted that my website header was blocking the center part of my image, so I promptly removed that. I realized now that I would have to incorporate these introductory phrases into the poster. I ended up making a black ellipse then putting the words in white over the top of it, then placing that in the blank space at the bottom of my image. I also decided to shrink the characters a little to bring more focus onto the ship in the center.
With all that completed, I felt like there was a little more depth I could add to the image. I decided to clip an adjustment layer to the “welcome” and edit that over the ship inside the letters to allow them to stand out a little more. I went with the color blue. While messing with the paint brush on the adjustment layer, I noticed that when I removed the layer from just the ship inside the letters, it made it feel more 3-Dimensional, so I left it. Thus the final result came to be.
I was able to use the images from Destiny 2 because they allow it in the Terms Of Use!
I decided to create a background image to my website for this project. The images I used for this project ended up being two images I had taken screenshots of originally as well as on I took during a play through.
The design I went for was the 1280 x 426 pixels but scaled up to 1980 x 660 as a widescreen poster. This fits my topic because I used screenshots of the game Destiny 2 while I played it. The process I went through to design the poster was first to cut out my characters from the game screenshots since I knew I’d be using them in the poster at some point. I decided to lay the characters out onto the blank 1980 x 660 blank poster and set them up as an asymmetrical design, laying the characters towards the borders of each side opposite of each other.
I wanted to utilize the weapon screenshots from the game CS:GO that I had originally posted in my “Pictures” blog post. I decided to try to cut them out using the pen tool but I ended up just using the AK-47 skin in the original design. I placed the cut-out of the skin in the center of the image, between the two character cut-outs.
Since I was using the poster as a background to my website, I wanted to add some welcoming text, so I did just that and wrote “welcome” in big letters. I found a cool effect called clipping where an image will appear in the text so I clipped the AK-47 skin to the text originally. later I decided to keep the theme of Destiny 2 so I swapped the image of the AK-47 with an image of my ship in Destiny 2. This is the final design I came up with:
I used the image of the ship as the background image and then copied the layer and clipped the copy to the text so it would look like the text is boxed and laid over the background image.
Some problems I came across while creating the poster was using the magic wand tool. Because the background and the characters I wanted to cut out were close in color, the use of the magic wand tool was not an option because it would select parts of the images that I did not want apart of the cut image. I had to use the pen tool (which I learned from the Photoshop assignment) to cut out the characters which ended up taking way longer than if the magic wand tool would have worked.
I was able to use the screenshots from the game ‘Destiny 2’ because the terms of service allows it as long as its not for commercial use.
After reading the terms of service from multiple game developers (of the games I play) I found that on every single one of them, they allow you to take screenshots, video recordings, etc of their games and allow the freedom to create content from these pieces of data as long as I am not using the creation for money!
Video games – They have become a huge center of enjoyment for millions of people from across the world. Not only are the games themselves fun to play, but huge audiences are tuning in to watch other people play these games on streaming platforms such as Twitch or YouTube. The 2018 League of Legends Championship Series alone set records bringing in 200 million viewers at once, doubling the viewer count of the super bowl that same year.
Photo Credits : Riot Games – Worlds 2018
But there’s more to streaming than just tournaments. Single people have found success on these same streaming platforms, drawing huge audiences of 40,000+ people at just one streaming session. Take, for example, Shroud. He has a follower count of over 5.1 million people. He racks up donations upwards of $10,000 a day as well as a sub-count reaching into the 300,000+ range. These subscribers pay anywhere from $5, $10, or even $100 a month, that’s a total of at least $1.5 dollars a month! Other people like Videogamedunkey have found success on the YouTube platform. Watch any one of his videos and tell me they don’t make you laugh! He was a large part in why I ended up in video game culture, which brings me to my final point – Why I chose gaming.
I decided to choose gaming as my topic because I love everything about it: the game play, the communities, and finally the friendships I have acquired over the years of playing. I feel like gaming will be a breeze when it comes to content creation because there are many ways people have shared game play already! I have pretty much all the projects mapped out for my topic already. For the graphic design project I could make a background photo for my stream on twitch or even my website of me playing games with my friends! For the Logo project I could make a logo for my YouTube channel. For the audio story I could interview some of my clan mates about how video games have shaped their lives. And finally, I could make a compilation video of me playing with my friends for the video story project!
I plan to capture all the footage myself on my computer by recording game play, and for the audio I can use my streaming software to record my clan mates vocals.